

Feb. 1, 2023: A Starmaster tuneup
All text and images copyright Michael E. Lockwood, all rights reserved, unless otherwise noted.
Well it's been a while. I can't apologize for that, because I've been overly busy and have had other things to do. Also, I've covered many things in this series, and sometimes it is difficult to think of new topics. (New talk topics don't always come easily now.)
I began working with Rick Singmaster, owner of Starmaster Telescopes, in early 2008. With the introduction of the Ethos eyepieces and Paracorr 2, we quickly started offering f/3.7 mirrors, including 18" f/3.7 mirrors, because they performed beautifully and were more convenient to use for those who had issues with ladders.
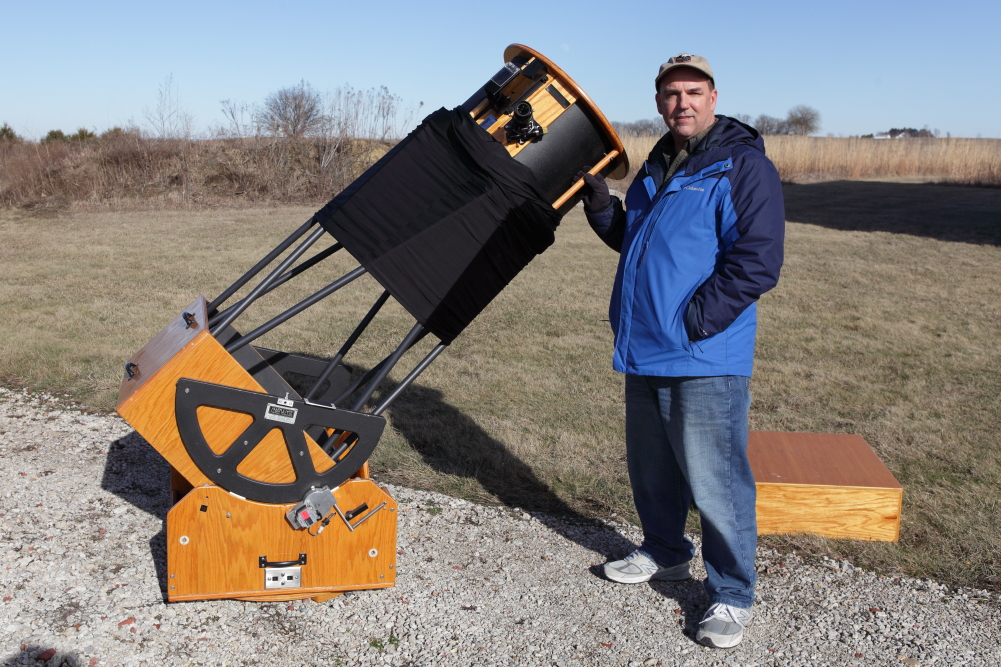
Recently I was contacted by Nick, the owner of an 18" f/3.7, who was now having some problems collimating his telescope. After some conversation, the problem could not be fixed via email, and he offered to bring his telescope to me to look at. He drove it up one sunny February afternoon and assembled it in my driveway.
When you are having collimation issues, you first check that the secondary mirror is not moving in its holder, and was against the lip of the holder. Both of these were true. However, the laser spot from the collimator was not centered on the secondary, which was odd. It was clear from just looking at it that the secondary mirror was tilted excessively, and I knew that this was likely be due to trying to make up for the mirror being rotated. Large tilt adjustments are required to fix a smaller rotation error, and this throws the secondary off-center.
The solution is to "neutralize" the secondary position and then recollimate. After turning the adjustment screws so that they had had approximately the same amount of screw behind the plate into which they were threaded, the secondary mirror was roughly "untilted", and in a "neutral" position, and the rotation error became evident when the laser dot landed VERY high on the primary mirror. Loosening the nut and rotating the secondary slightly counterclockwise came very close to centering the laser dot. Fine adjustments completed the alignment.
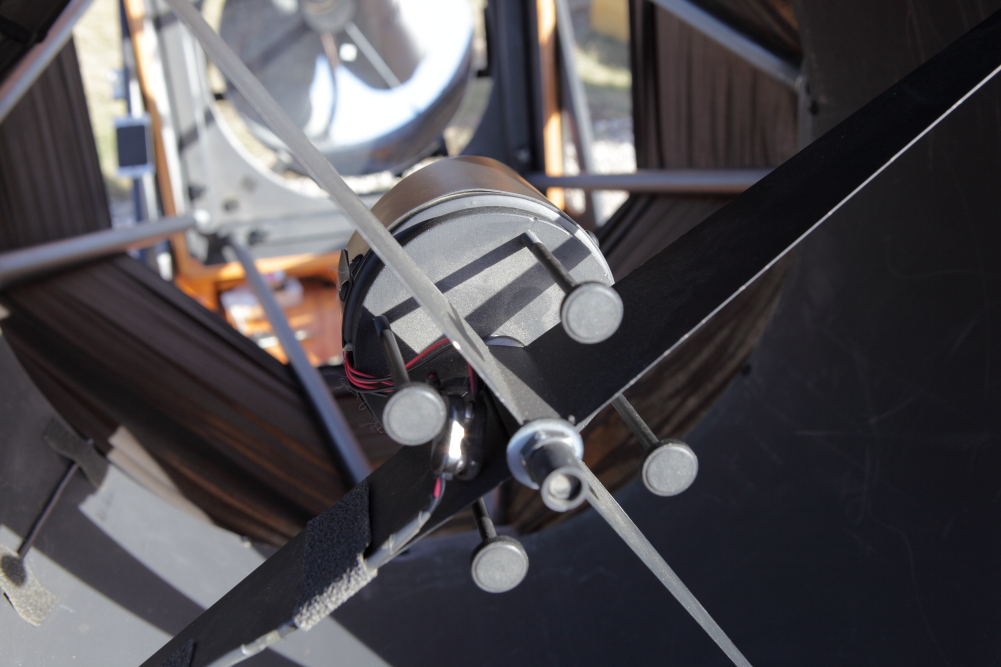
Rick always told people to not touch the two adjustment screws that tilted the secondary vertically (top and bottom screws in the photo below). Instead, one should rotate the secondary for the bulk of the vertical adjustment (of the spot on the primary), and adjust the other two screws for horizontal adjustment. This is good advice in the dark, when it's easy to seriously mess things up without knowing it, however some fine adjustment of the vertical screws is almost always needed to nail it.
After some use, I recommend that you equalize the screws and check for unnecessary rotation of the secondary and correct it if necessary. This is one adjustment that you have to keep an eye on over time.
Next, we turned our attention to the primary mirror cell.
First, I noticed that the primary collimation adjustment screws were backed off so far that one screw had no more out-travel, meaning it could not be loosened any further. So, I turned each screw clockwise the same number of turns (three or four, I believe), so that adjustment was possible in both directions, not just inward.
While doing this, I noticed that the primary was not sitting against the whiffletree edge supports. This was unusual, given that the telescope was pointed quite low. After a little jiggling, a noise was heard and the primary mirror shifted about 1/8" downward! As I have experienced before, the primary had become stuck to the rear supports, and was thus in the wrong spot, and no doubt was being distorted. (Gluing a primary to its rear supports can also distort the mirror if the glass is not quite thick. I do not recommend it.)
Over time, dirt and other stuff accumulates on the mirror supports, and if water (dew) is added, eventually this forms a type of glue that can cause the glass to stick to the plastic support points. I have seen this many times, and this had indeed happened. With the primary unstuck and properly positioned, we adjusted the collimation screws, and colimation was complete. We did some daytime viewing of the moon, but the seeing was not good. A nighttime view was required to confirm that everything was working properly.
Nick packed up the telescope and headed home. He later reported that the images appeared to be normal again, so it appears that the tuneup was successful. I hope the skies are clear at some point so that he can enjoy the telescope, it's been a VERY cloudy winter here.
It is also standard Starmaster maintenance procedure to check the snugness of all fasteners on the telescope once or twice per year. Bolts and wood screws may loosen over time and with changes in humidity, so keep an eye on it. Rick made his telescopes so parts could be removed and replaced if necessary, and so this is necessary.
I still love using my 20" f/3.0 Starmaster, and with care, these instruments should last many decades.
Please check back for future installments of "In the Shop".
Mike Lockwood
Lockwood Custom Optics